
You’ve finally pulled the trigger on a saltwater aquarium. The tank is cycled, the live rock is placed, and you’re staring at your first few corals. Then reality hits: water chemistry.
Between alkalinity, calcium, magnesium, phosphate, nitrate, and salinity, the list of things you need to measure seems endless. And if you price out a full professional testing lab setup, you might choke on your morning coffee. The good news? You do not need to spend $500 on reef tank equipment to keep your inhabitants healthy. A budget-friendly testing kit is entirely possible if you know which tests matter most, where to save money, and which tools actually deliver reliable results.
What Is a Reef Tank Testing Kit and Why Do You Need One?
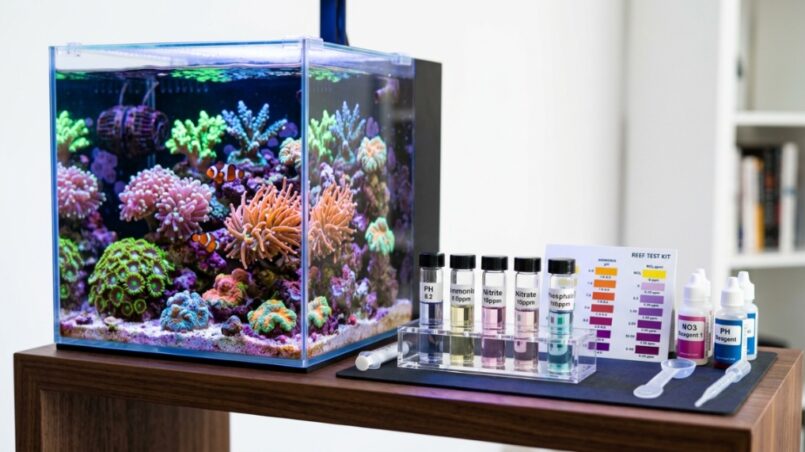
A reef tank testing kit is a collection of tools and reagents used to measure the chemical parameters of your saltwater aquarium. Without regular testing, your corals will starve, your pH can crash, and your fish may suffer from osmotic shock. The core parameters every reef keeper must track include alkalinity, calcium, magnesium, nitrate, phosphate, pH, and salinity. A budget-friendly kit prioritizes the most critical tests while skipping expensive automation or premium brand markups.
The Minimum Parameters You Cannot Ignore
If you are building a testing kit on a strict budget, focus on these five tests first:
- Alkalinity – Stabilizes pH and provides carbonate for coral skeleton growth.
- Calcium – Essential for stony corals and coralline algae.
- Magnesium – Maintains calcium and alkalinity levels by preventing precipitation.
- Nitrate – Indicates biological filtration efficiency and nutrient load.
- Salinity/Specific Gravity – Directly affects osmoregulation in all tank inhabitants.
Why Not Just Buy a Single All-in-One Kit?
All-in-one kits from major brands often cost $80–$150 and include tests you might not use frequently. Worse, some budget all-in-one kits use lower-quality reagents that expire quickly or give inconsistent readings. Instead of buying one big box, you get more value by assembling a custom kit based on your specific tank size and livestock. A 20-gallon nano reef needs different priorities than a 120-gallon mixed reef.
When an All-in-One Kit Actually Makes Sense
If you are absolutely new to the hobby and feel overwhelmed by choice, a basic all-in-one saltwater test kit (like the API Saltwater Master Kit) costs around $30 and covers pH, ammonia, nitrite, and nitrate. This is fine for the fish-only phase. However, once you add corals, you will outgrow that kit quickly and need to supplement it with individual tests.
How Much Should You Spend on a Starter Testing Kit?
A reliable budget-friendly reef tank testing kit should cost between $40 and $90 total. That includes a refractometer, a basic alkalinity test, a calcium test, a magnesium test, and a nitrate test. You can get functional results from brands like Salifert, Nyos, or Red Sea at roughly $15–$25 per test. Skip the $50 digital photometers until you confirm you are committed to the hobby long-term.
Where Not to Skimp
- Refractometer – Do not use a floating hydrometer. Buy a $20–$30 refractometer with automatic temperature compensation (ATC). It is the single most important tool for salinity measurement.
- Alkalinity test – This is the parameter you will test most frequently. A good titration-based test like Salifert Alk is worth the extra few dollars.
- Calcium test – Cheap calcium tests can be finicky. Stick with Nyos or Salifert for consistent endpoint detection.
Which Testing Methods Are Most Accurate on a Budget?
Titration-based liquid tests are the gold standard for accuracy under $30. They rely on a color change reaction that you control drop by drop. Colorimetric tests are also accurate but require good lighting and color vision. Test strips are fast and cheap, but they lack the precision needed for sensitive coral systems. For salinity, a refractometer is significantly more accurate than a hydrometer and only costs marginally more.
Comparison of Budget Testing Methods
| Method | Accuracy | Cost per Test | Best For |
|---|---|---|---|
| Titration | High | $0.30–$0.80 | Alkalinity, Calcium, Magnesium |
| Colorimetric | Moderate–High | $0.50–$1.00 | Nitrate, Phosphate |
| Test Strips | Low–Moderate | $0.10–$0.25 | Quick checks between tests |
| Refractometer | High | One-time $20–$30 | Salinity |
How to Prioritize Your Testing Schedule Without Breaking the Bank
You do not need to test everything every day. A practical budget-friendly schedule looks like this:
- Daily – Check salinity and temperature. Visually inspect corals and fish.
- Weekly – Test alkalinity, calcium, and magnesium.
- Bi-weekly – Test nitrate and phosphate.
- Monthly – Test pH and trace elements if you have sensitive corals.
This schedule maximizes the lifespan of your test kit reagents. Most liquid test kits last 12–18 months if stored properly in a cool, dark place.
Extending the Life of Your Reagents
Keep reagent bottles tightly sealed. Do not expose them to direct sunlight or high humidity. Write the opening date on each bottle with a permanent marker. If a reagent changes color, becomes cloudy, or smells different, replace it immediately. Old reagents produce false readings that can crash your tank.
Can You Use Household Items to Test Reef Tank Water?
No. Do not attempt to test your reef tank water with household vinegar, baking soda tests, or pool test strips. These lack the sensitivity required for marine aquarium parameters. A few dollars spent on proper reagents will save you hundreds in lost corals and livestock. The only exception is using a calibrated digital thermometer from a kitchen supply store for temperature—but ensure it is accurate within 0.5°F.
What Are the Most Common Mistakes Beginners Make When Building a Budget Kit?
- Buying the cheapest refractometer without ATC – Without automatic temperature compensation, your salinity reading will drift as the water temperature changes.
- Ignoring expiration dates – Many budget kits sit on store shelves for months. Always check the production date before buying.
- Skipping magnesium testing – Magnesium stabilizes calcium and alkalinity. Without it, your calcium and alkalinity will swing wildly.
- Using expired calibration fluid – Refractometers need calibration with 35 ppt solution monthly. Expired fluid will give false salinity readings.
- Over-relying on test strips for alkalinity – Strips cannot give the 0.1 dKH precision needed for an SPS-dominated tank.
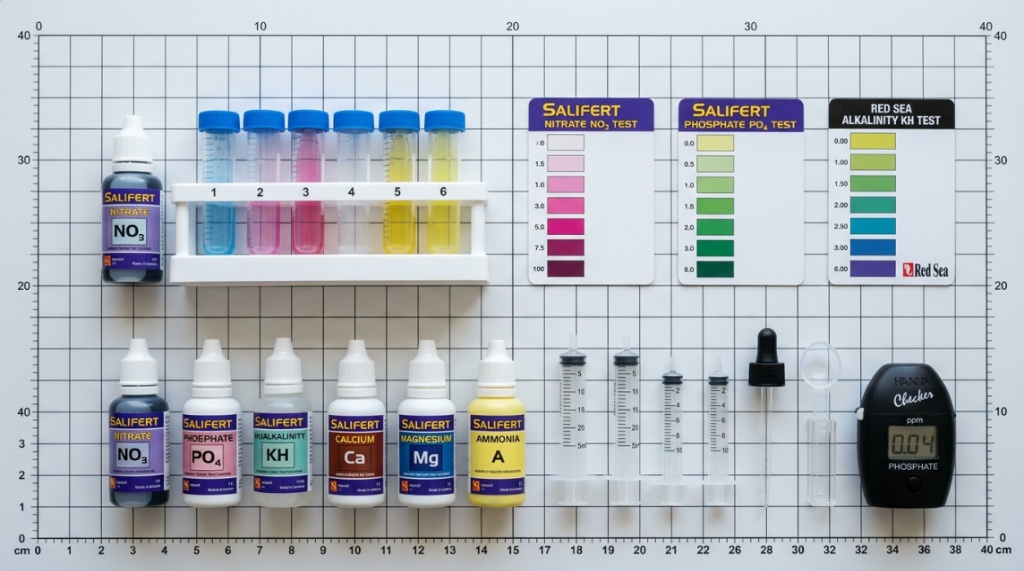
How to Choose Between Salifert, Nyos, Red Sea, and API
Each brand has strengths based on your budget and experience level. Here is a quick breakdown:
- API – Cheapest option. Acceptable for fish-only tanks. Reagents expire quickly. Not recommended for reef tanks.
- Salifert – Industry standard for accuracy. Clear color endpoints. Moderate price ($18–$22 per kit). Excellent for alkalinity and calcium.
- Nyos – Very easy to read. High accuracy. Slightly more expensive ($20–$25). Great for beginners who struggle with color changes.
- Red Sea – High accuracy but uses more complex procedures. Good for experienced reefers. Reagents last longer.
For a budget-friendly kit, start with Salifert for alkalinity, calcium, and magnesium, then pair it with a $25 refractometer and a Nyos nitrate test. That combination gives professional-grade accuracy for under $90.
Should You Invest in a Digital Meter Now or Later?
Digital meters for alkalinity, calcium, or phosphate are not necessary for a budget-friendly setup. They cost $150–$400 each and require calibration solutions that add ongoing expense. Reserve digital meters for salinity (a handheld digital refractometer is around $80 if you upgrade later) or for pH (a decent pH probe is $50). For the first year of reefing, liquid tests are perfectly adequate and far more cost-effective.
When to Upgrade to a Digital Meter
If you find yourself testing alkalinity more than three times per week, or if you have a high-demand SPS system, consider a Hanna Checker for alkalinity. At roughly $50, it provides a digital readout with no color guessing. That single upgrade can dramatically reduce testing frustration without blowing your budget.
How to Store Your Testing Kit to Maximize Value
Your test kit investment only pays off if the reagents stay fresh. Follow these storage rules:
- Store all reagents in a cool, dark cabinet (65–75°F ideal).
- Keep bottles upright to prevent reagent from drying in the cap.
- Do not refrigerate unless specified by the manufacturer.
- Use distilled water for rinsing test vials, not tap water.
- Clean glass vials after every single use to prevent residue buildup.
Can You Build a Testing Kit for Under $50?
Yes, but with limitations. For under $50, you can buy a refractometer ($25), an API alkalinity test ($12), and an API calcium test ($12). That covers the absolute minimum for a soft coral or fish-only tank. However, you will be missing magnesium and reliable nitrate testing. If you plan to keep LPS corals like hammer or frogspawn, stretch your budget to $70 to include a Salifert magnesium test. The extra $20 is the difference between success and chronic parameter swings.
Maintaining stable water parameters with a budget-friendly reef tank testing kit ensures your corals can grow, but they also need the right spectrum to thrive. Once your chemistry is dialed in, make sure you pair it with the Best LED Lights for Reef Tanks in 2026 to maximize their color and growth.
Frequently Asked Questions
How often should I calibrate my refractometer?
Calibrate your refractometer every month using 35 ppt calibration solution. If you drop the unit or see sudden salinity changes, recalibrate immediately. Calibration solution costs about $8 and lasts for months.
Can I use expired test kits in an emergency?
No. Expired reagents give unreliable results that can lead to serious husbandry mistakes. Always replace any test kit past its expiration date, even if it was never opened.
Is a pH test necessary for a budget reef tank?
Not as a daily test. pH tends to be stable in mature reef tanks if alkalinity is maintained. A simple pH test every two weeks is sufficient unless you are troubleshooting a problem.
What is the most important test for a new reef tank?
Salinity. A refractometer is the first tool every new reefer should buy. Salinity affects osmoregulation, alkalinity readings, and coral health more than any other single parameter.
Can I mix test brands in one kit?
Yes, and many experienced reefers do exactly that. Mixing Salifert alkalinity with Nyos calcium and Red Sea nitrate is perfectly fine and often gives better results than any single brand’s full lineup.
How do I know if my test results are accurate?
Use a reference solution periodically. Some brands sell certified standard solutions for alkalinity, calcium, and nitrate. Testing a known standard confirms your technique and reagent quality.
Should I buy a test for phosphate immediately?
Only if you have corals or algae problems. For the first three months of a reef tank, nitrate and visual algae observation are usually sufficient. Add a phosphate test when you see nuisance algae or if you start dosing phytoplankton.
Conclusion
Building a budget-friendly reef tank testing kit is about smart prioritization, not cutting corners. Focus your money on a quality refractometer, a reliable alkalinity test, and a trustworthy calcium and magnesium test. Skip the expensive digital meters and all-in-one kits until you are sure you need them. With $70–$90 and a consistent testing schedule, you can maintain stable water chemistry that keeps your corals thriving and your fish healthy. Start with the tools that matter most, test regularly, and upgrade only when your specific tank demands it. Your reef tank—and your wallet—will thank you.